
Difficult Pressure Dressings
Here are some solutions to apply and continue direct pressure without having to keep your knee in someone’s crotch the whole time. These can be done with Kerlix gauze and Ace / elastic bandages, so no need to break your bank getting some cool guy gear to do what good use of basic supplies can do well.
Remember most bleeding can be stopped with wound packing and direct pressure. TQ and hemostatic agents, when you can use them, make it stop faster.
Here’s a little video on wound packing that uses a Boston butt or similar creatively.
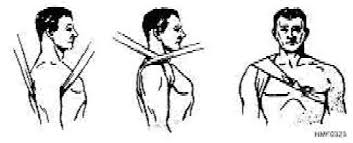
For lateral neck wounds such as a carotid artery, take the contra lateral (opposite side) arm and raise it vertically. Wrap the pressure dressing around the neck and the vertical arm.


The pressure dressing is directly on the wound and the arm keeps pressure off the intact side of the neck. Wounds might be a laceration, shrapnel, or spall from metallic body armor deflecting bullet fragments into the neck. Caution in suspected cervical spine injury, however, hemostasis is still the priority issue in significantly bleeding wounds.
For wounds on the back of the neck place the patients non-dominant palm on the forehead and wrap as above. The forearm and hand provide protection from pressure on the airways while supporting the head up despite the damaged muscles. The arm also supports the weight of the head providing splinting for the wound.
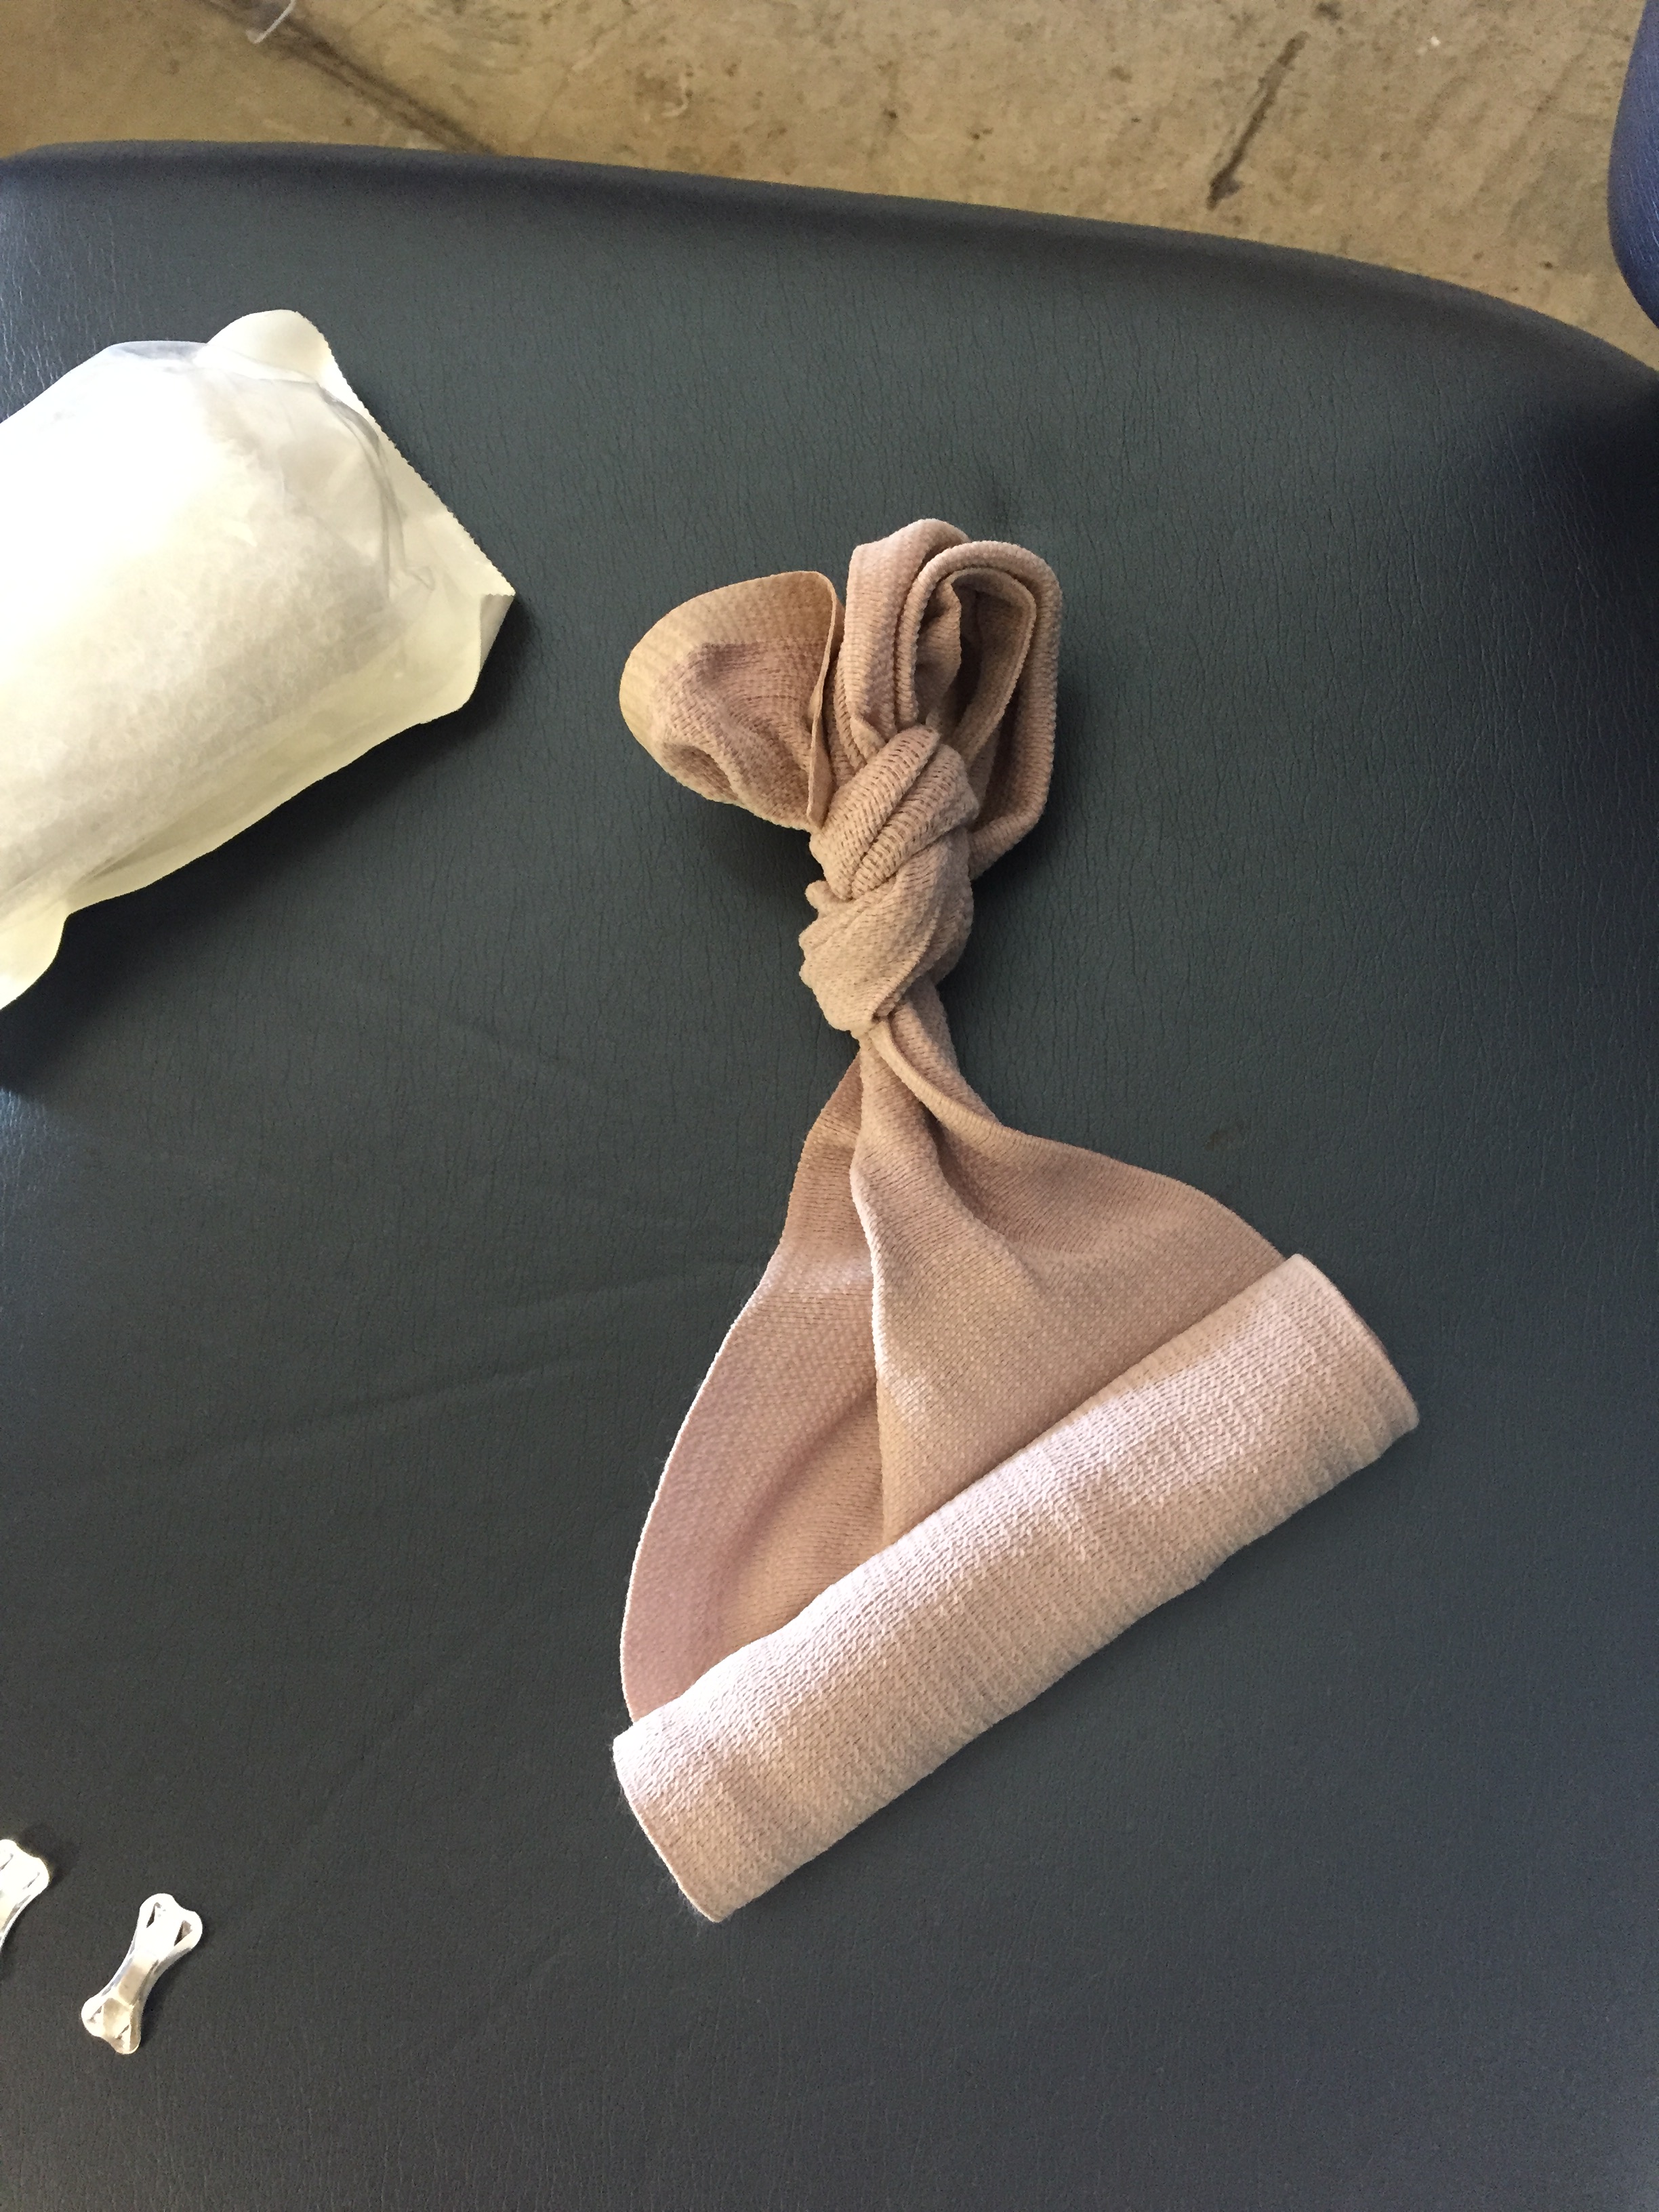
For armpits use a figure eight wrap around the shoulders with an elastic bandage/ace wrap pulled tight to get direct pressure on the packing.
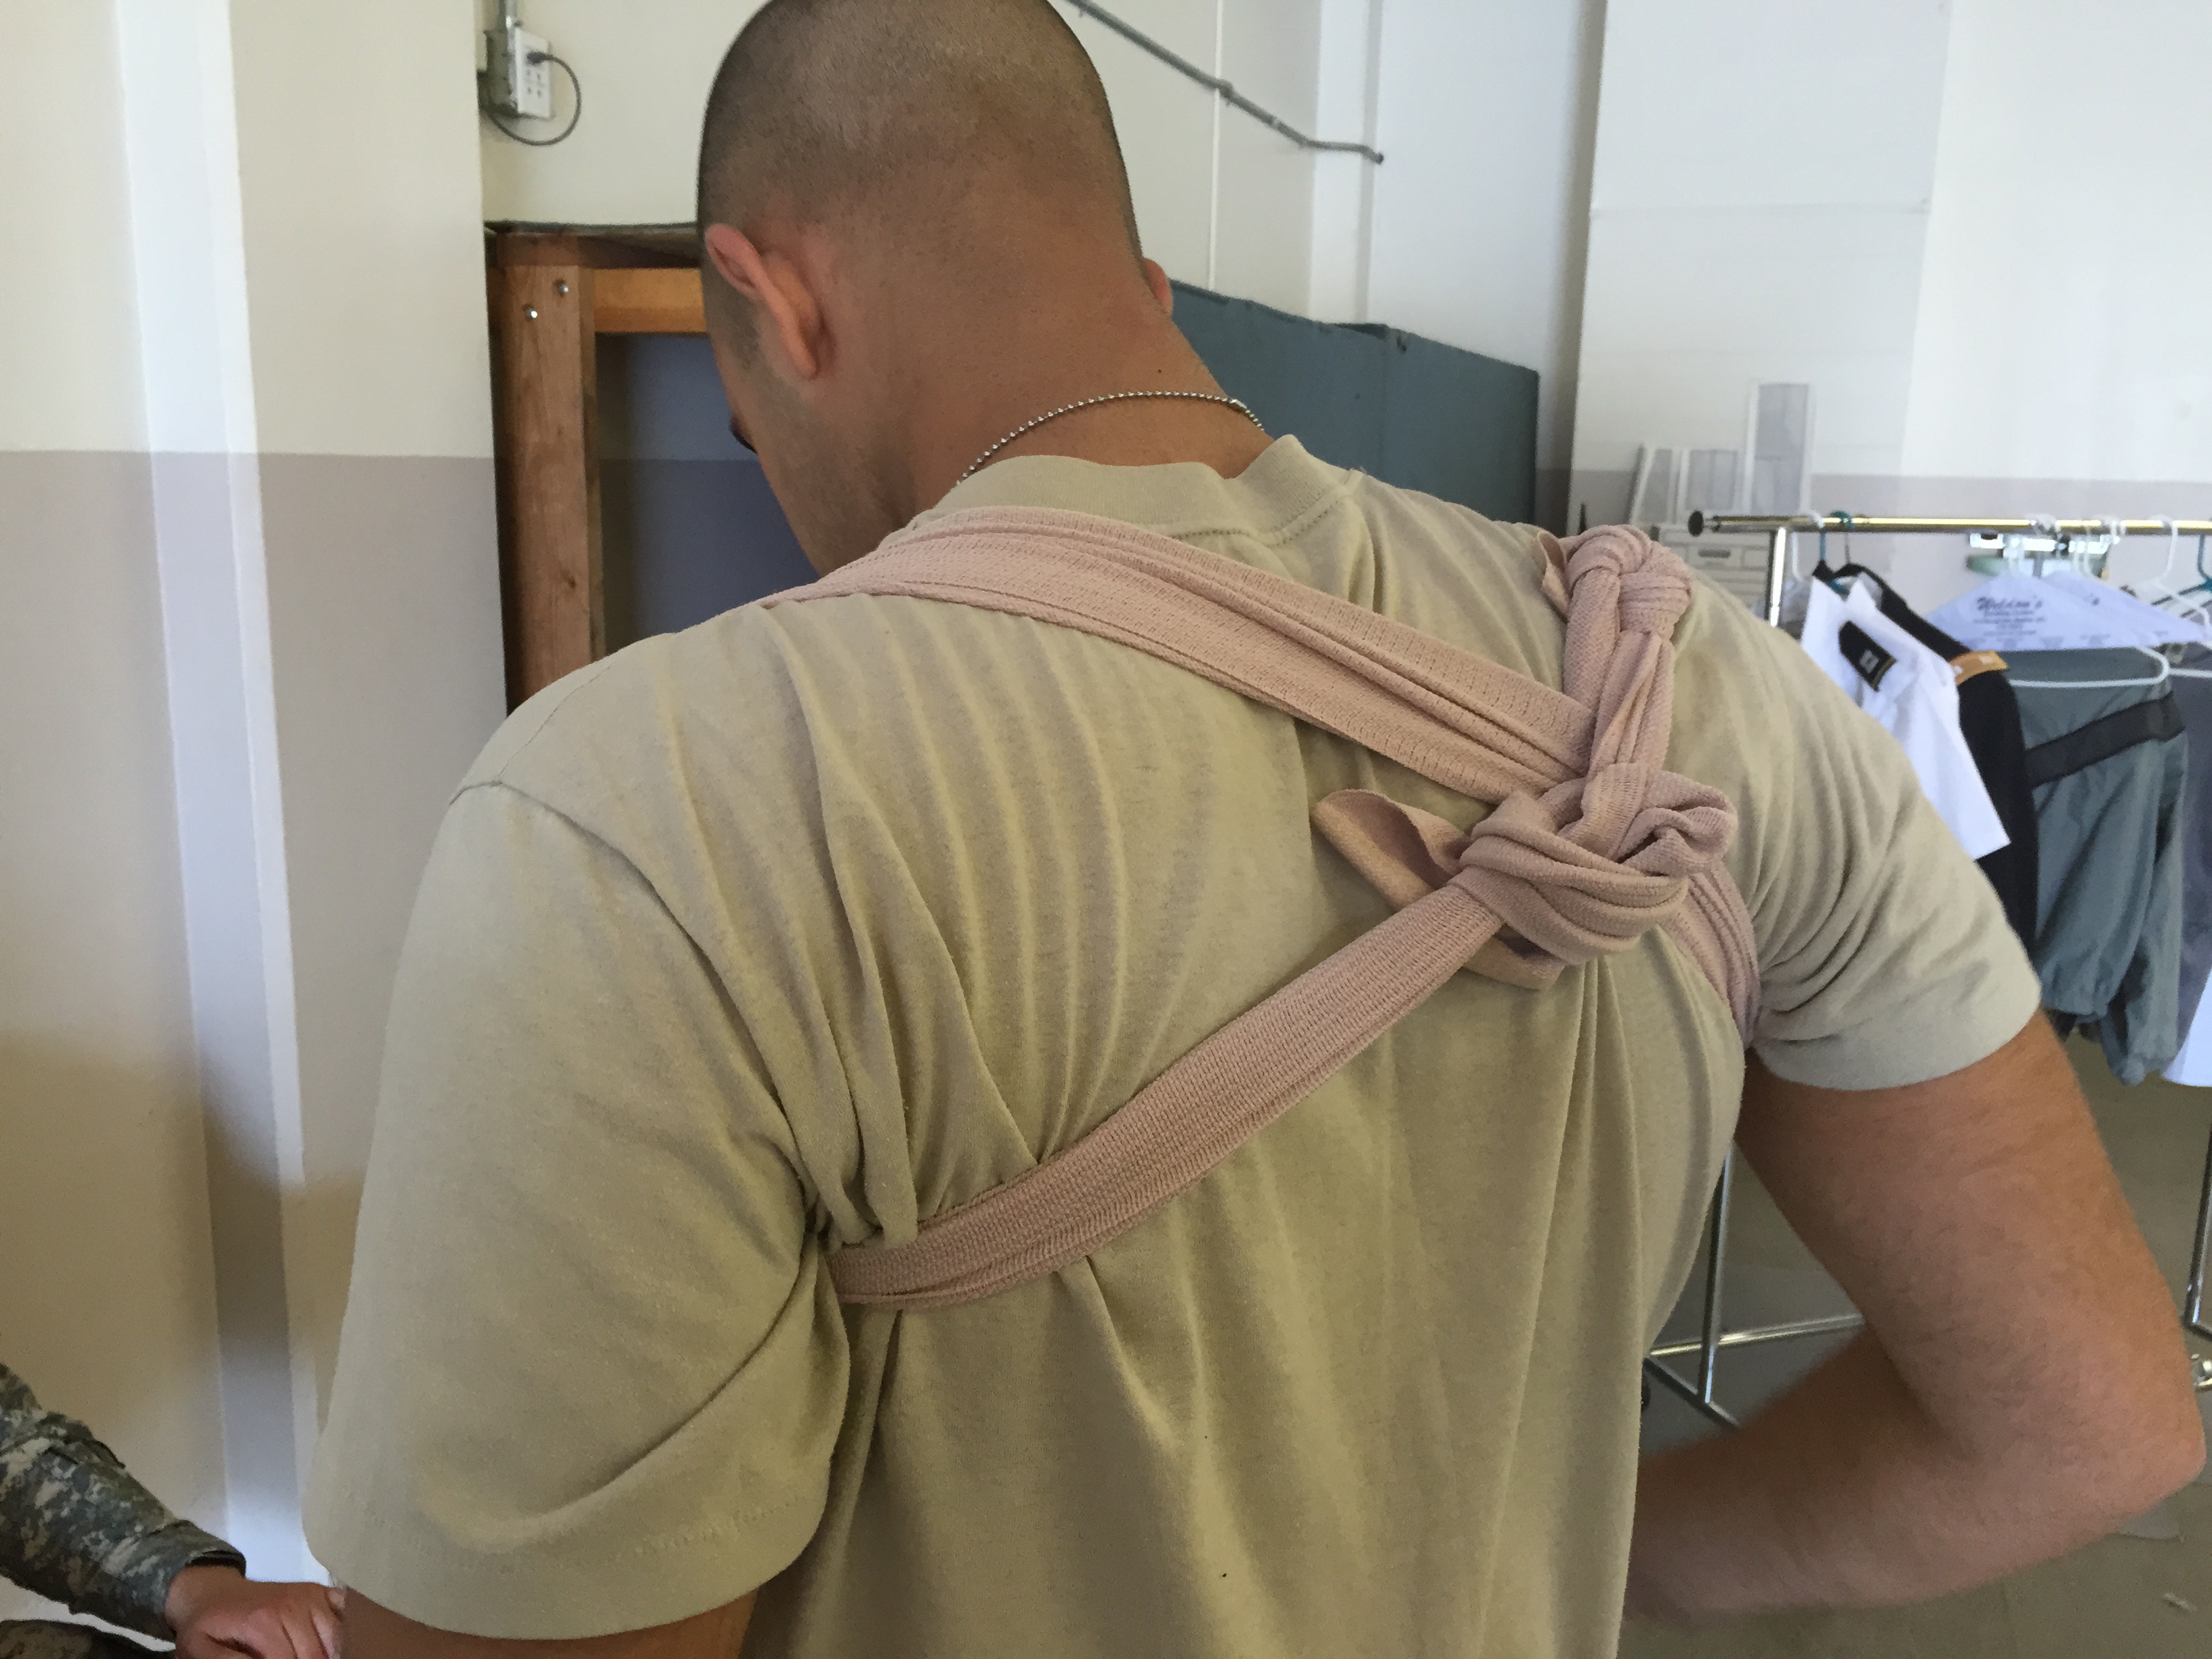

Next place further padding in the arm pit. Invert the bottom edge of the t-shirt over the injured arm in a sling position. Wrap the torso and injured arm to apply further pressure on the arm pit pad but not so tight as to interfere with respirations. Similarly, this can be run in a variety of creative patterns to create some pressure on any specific area of the upper back.
For the groin expose the wound by cutting the pants, leaving the belt intact. Roll the patient onto the uninjured side into the rescue position. Tuck an elastic bandage under the belt in the front on the injured side.
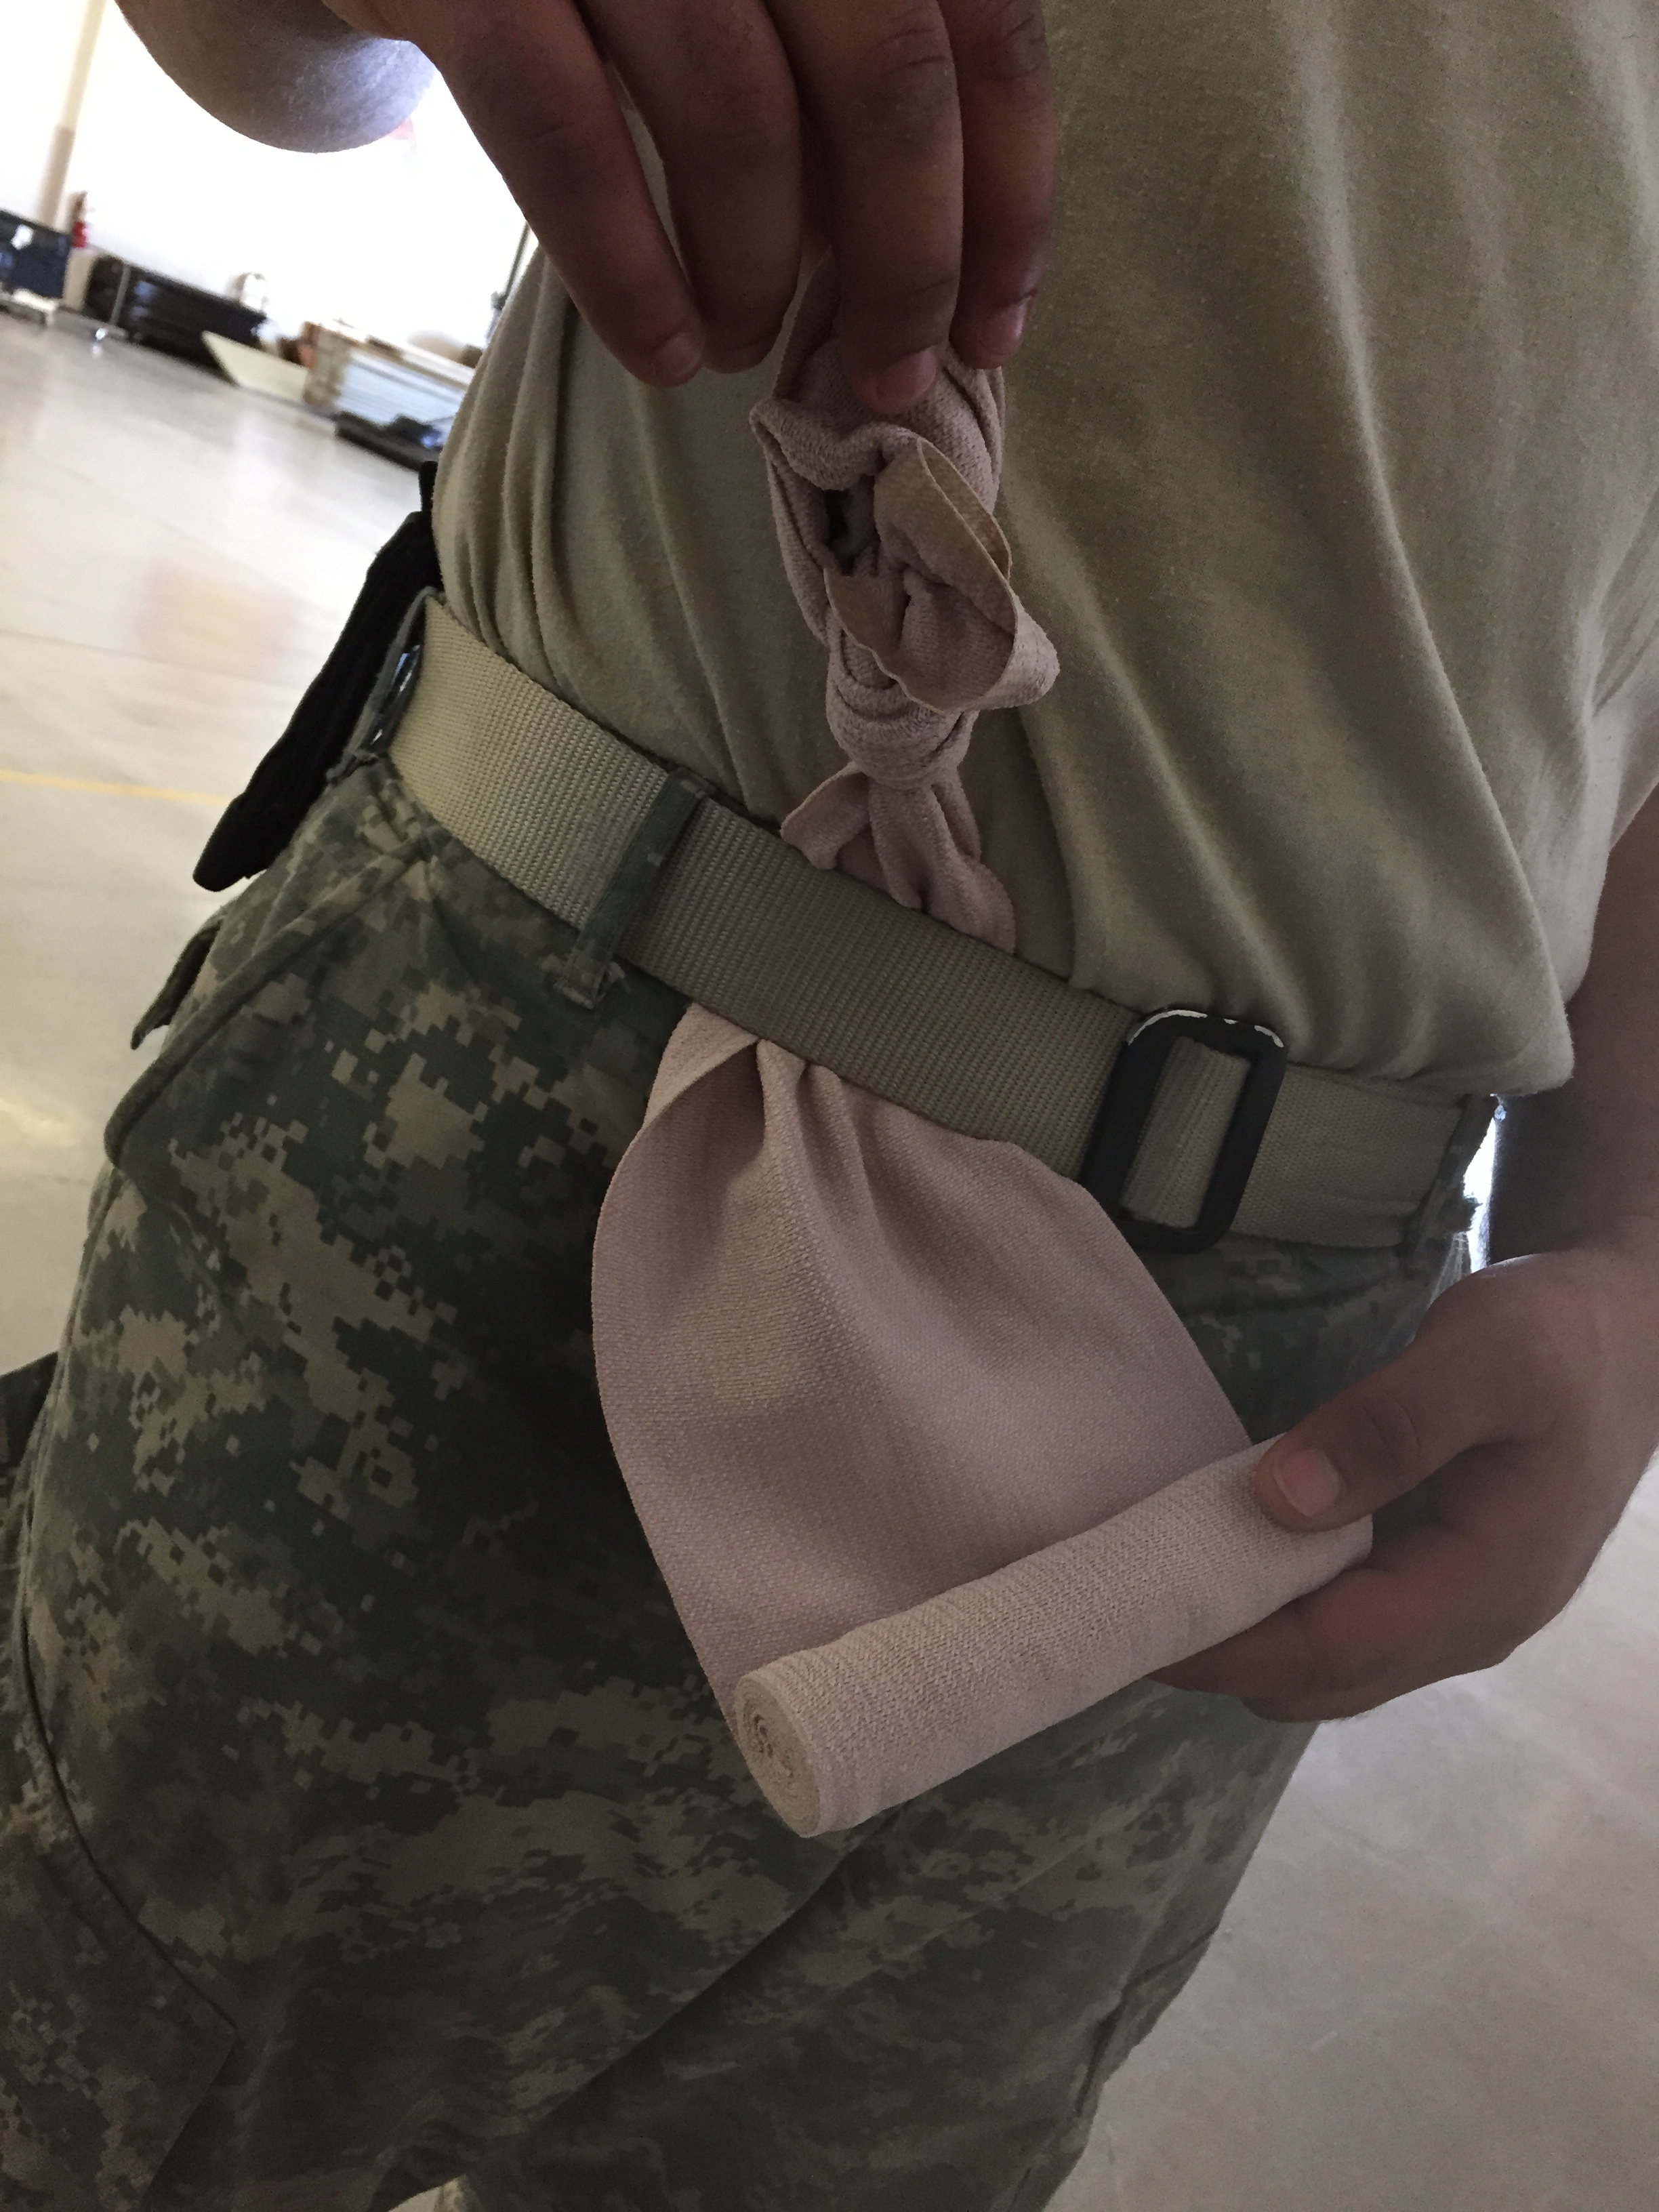
Tie a loop in the short end of the elastic wrap you tucked under the belt. Pull the long end through the groin tightly over the packed wound, tuck it under the belt in the back and pass it back through the groin as many times as needed to cover the area needing pressure.
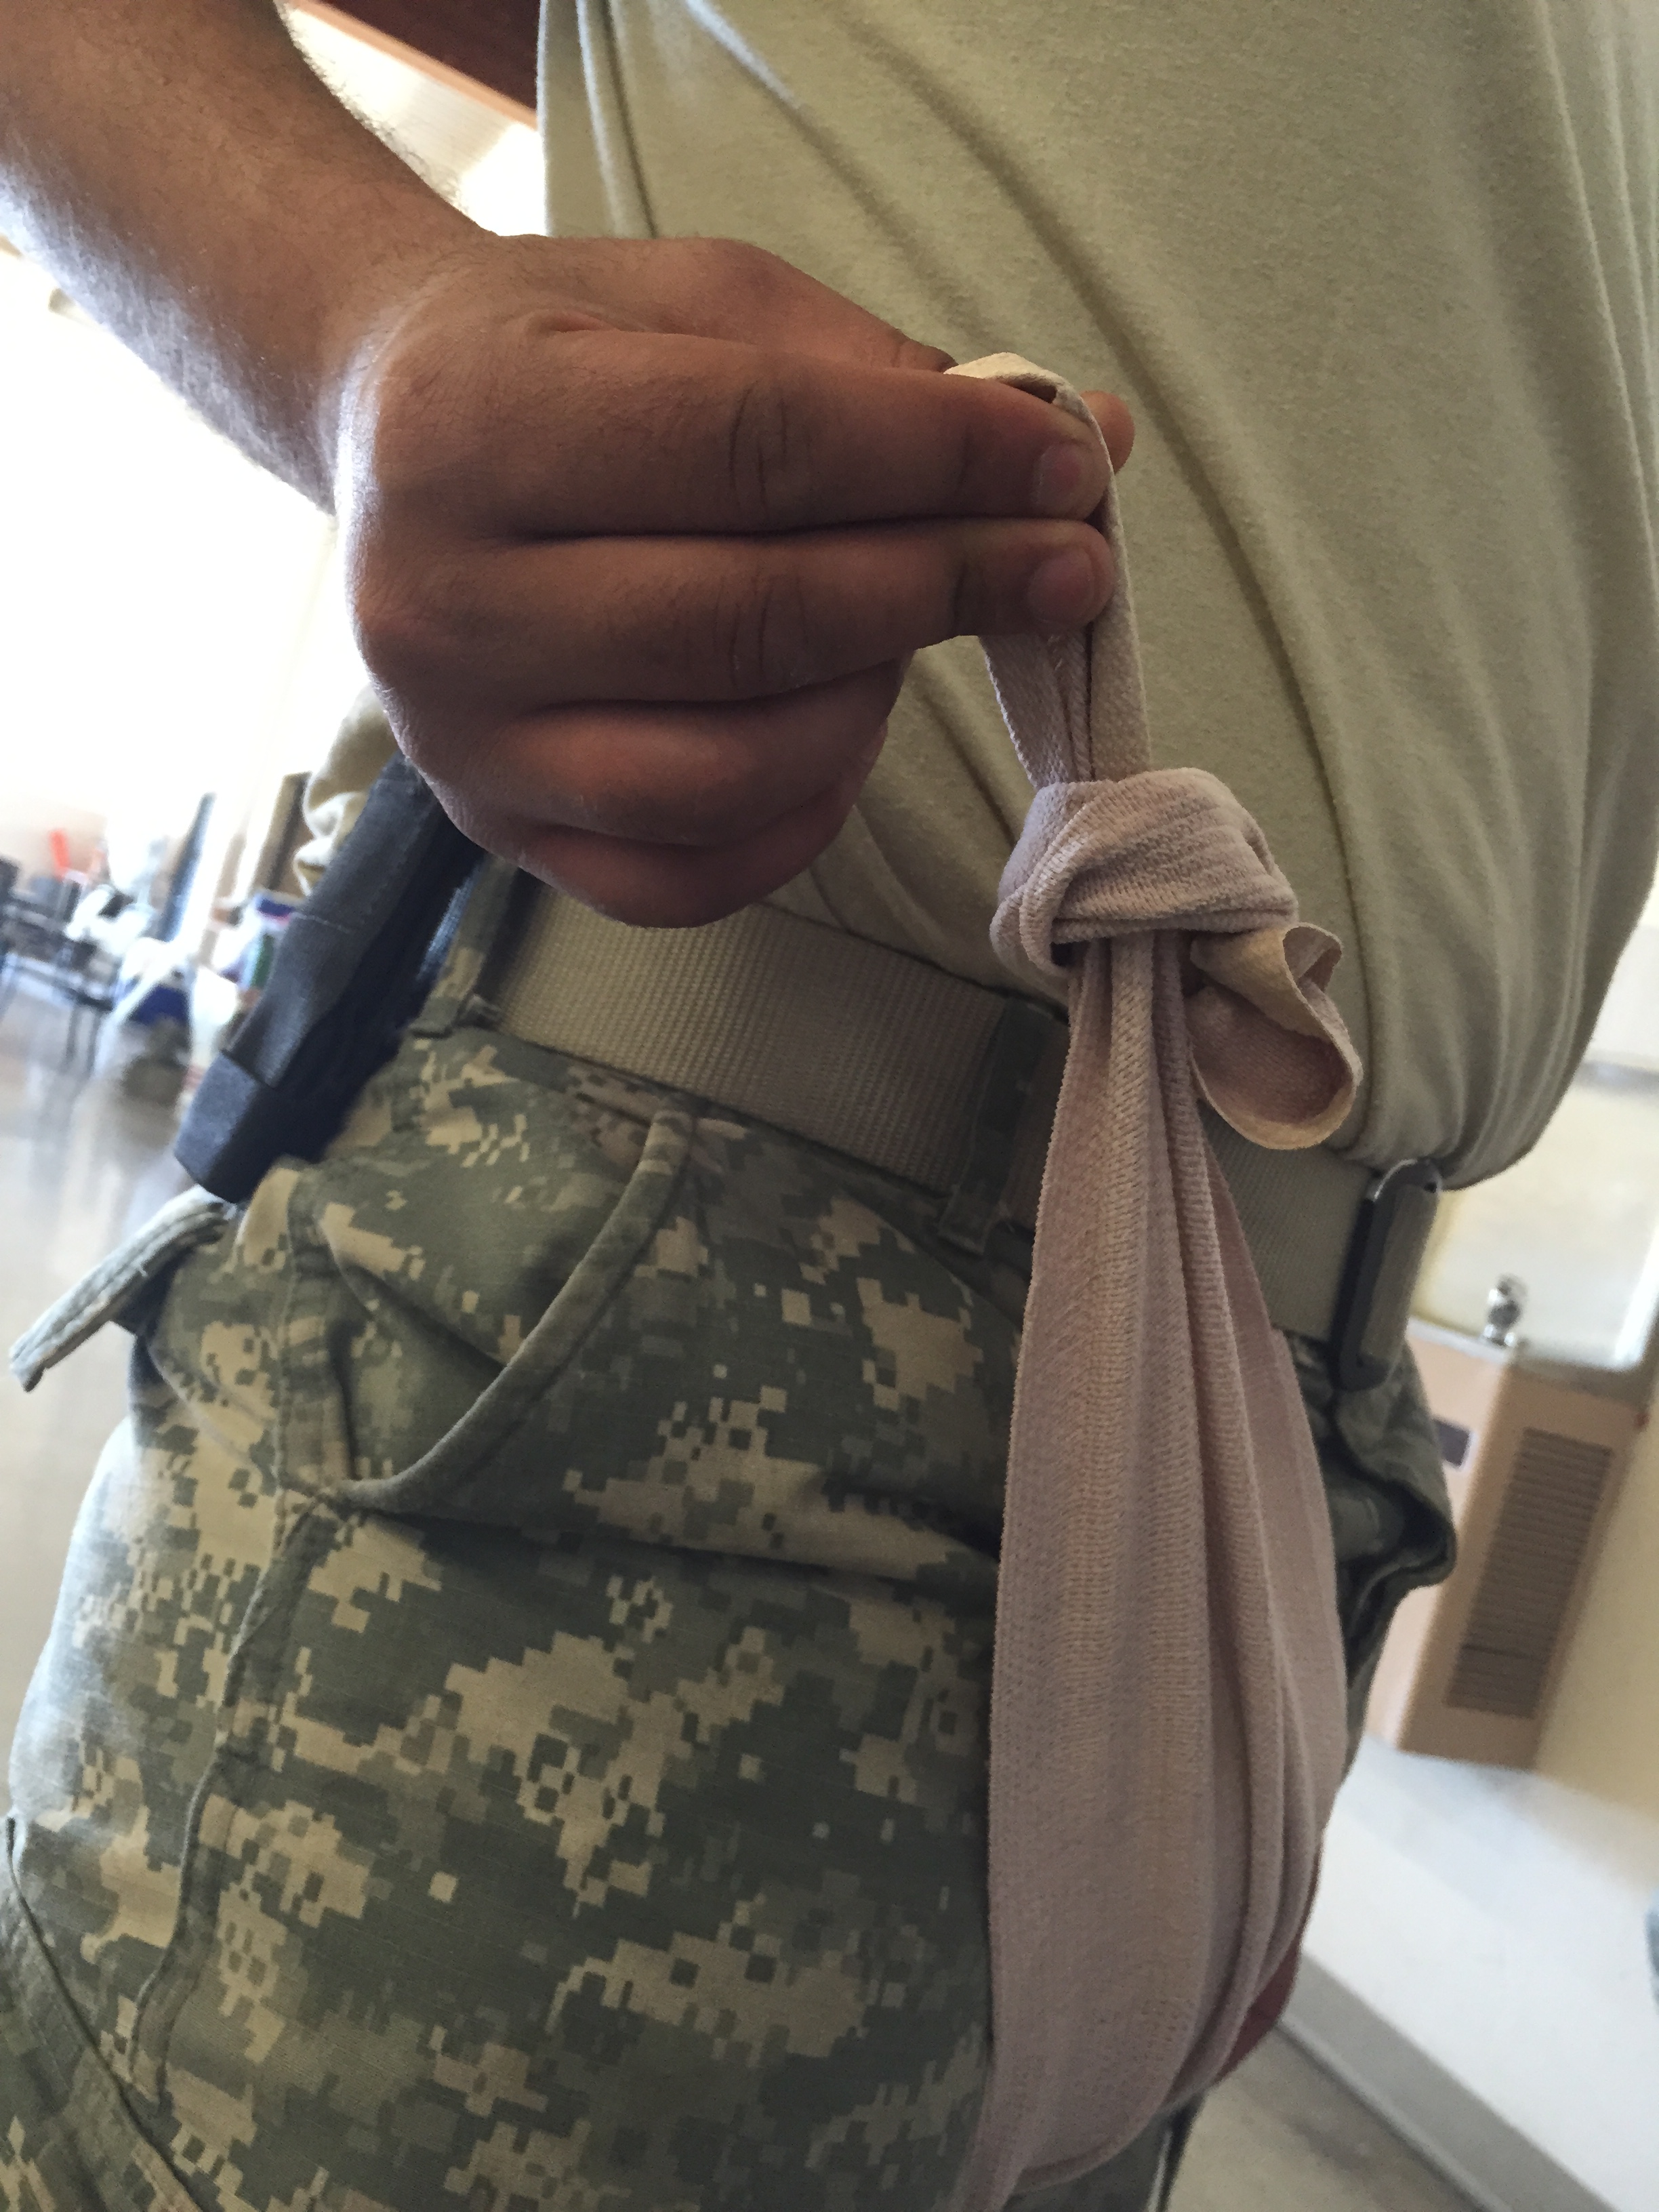
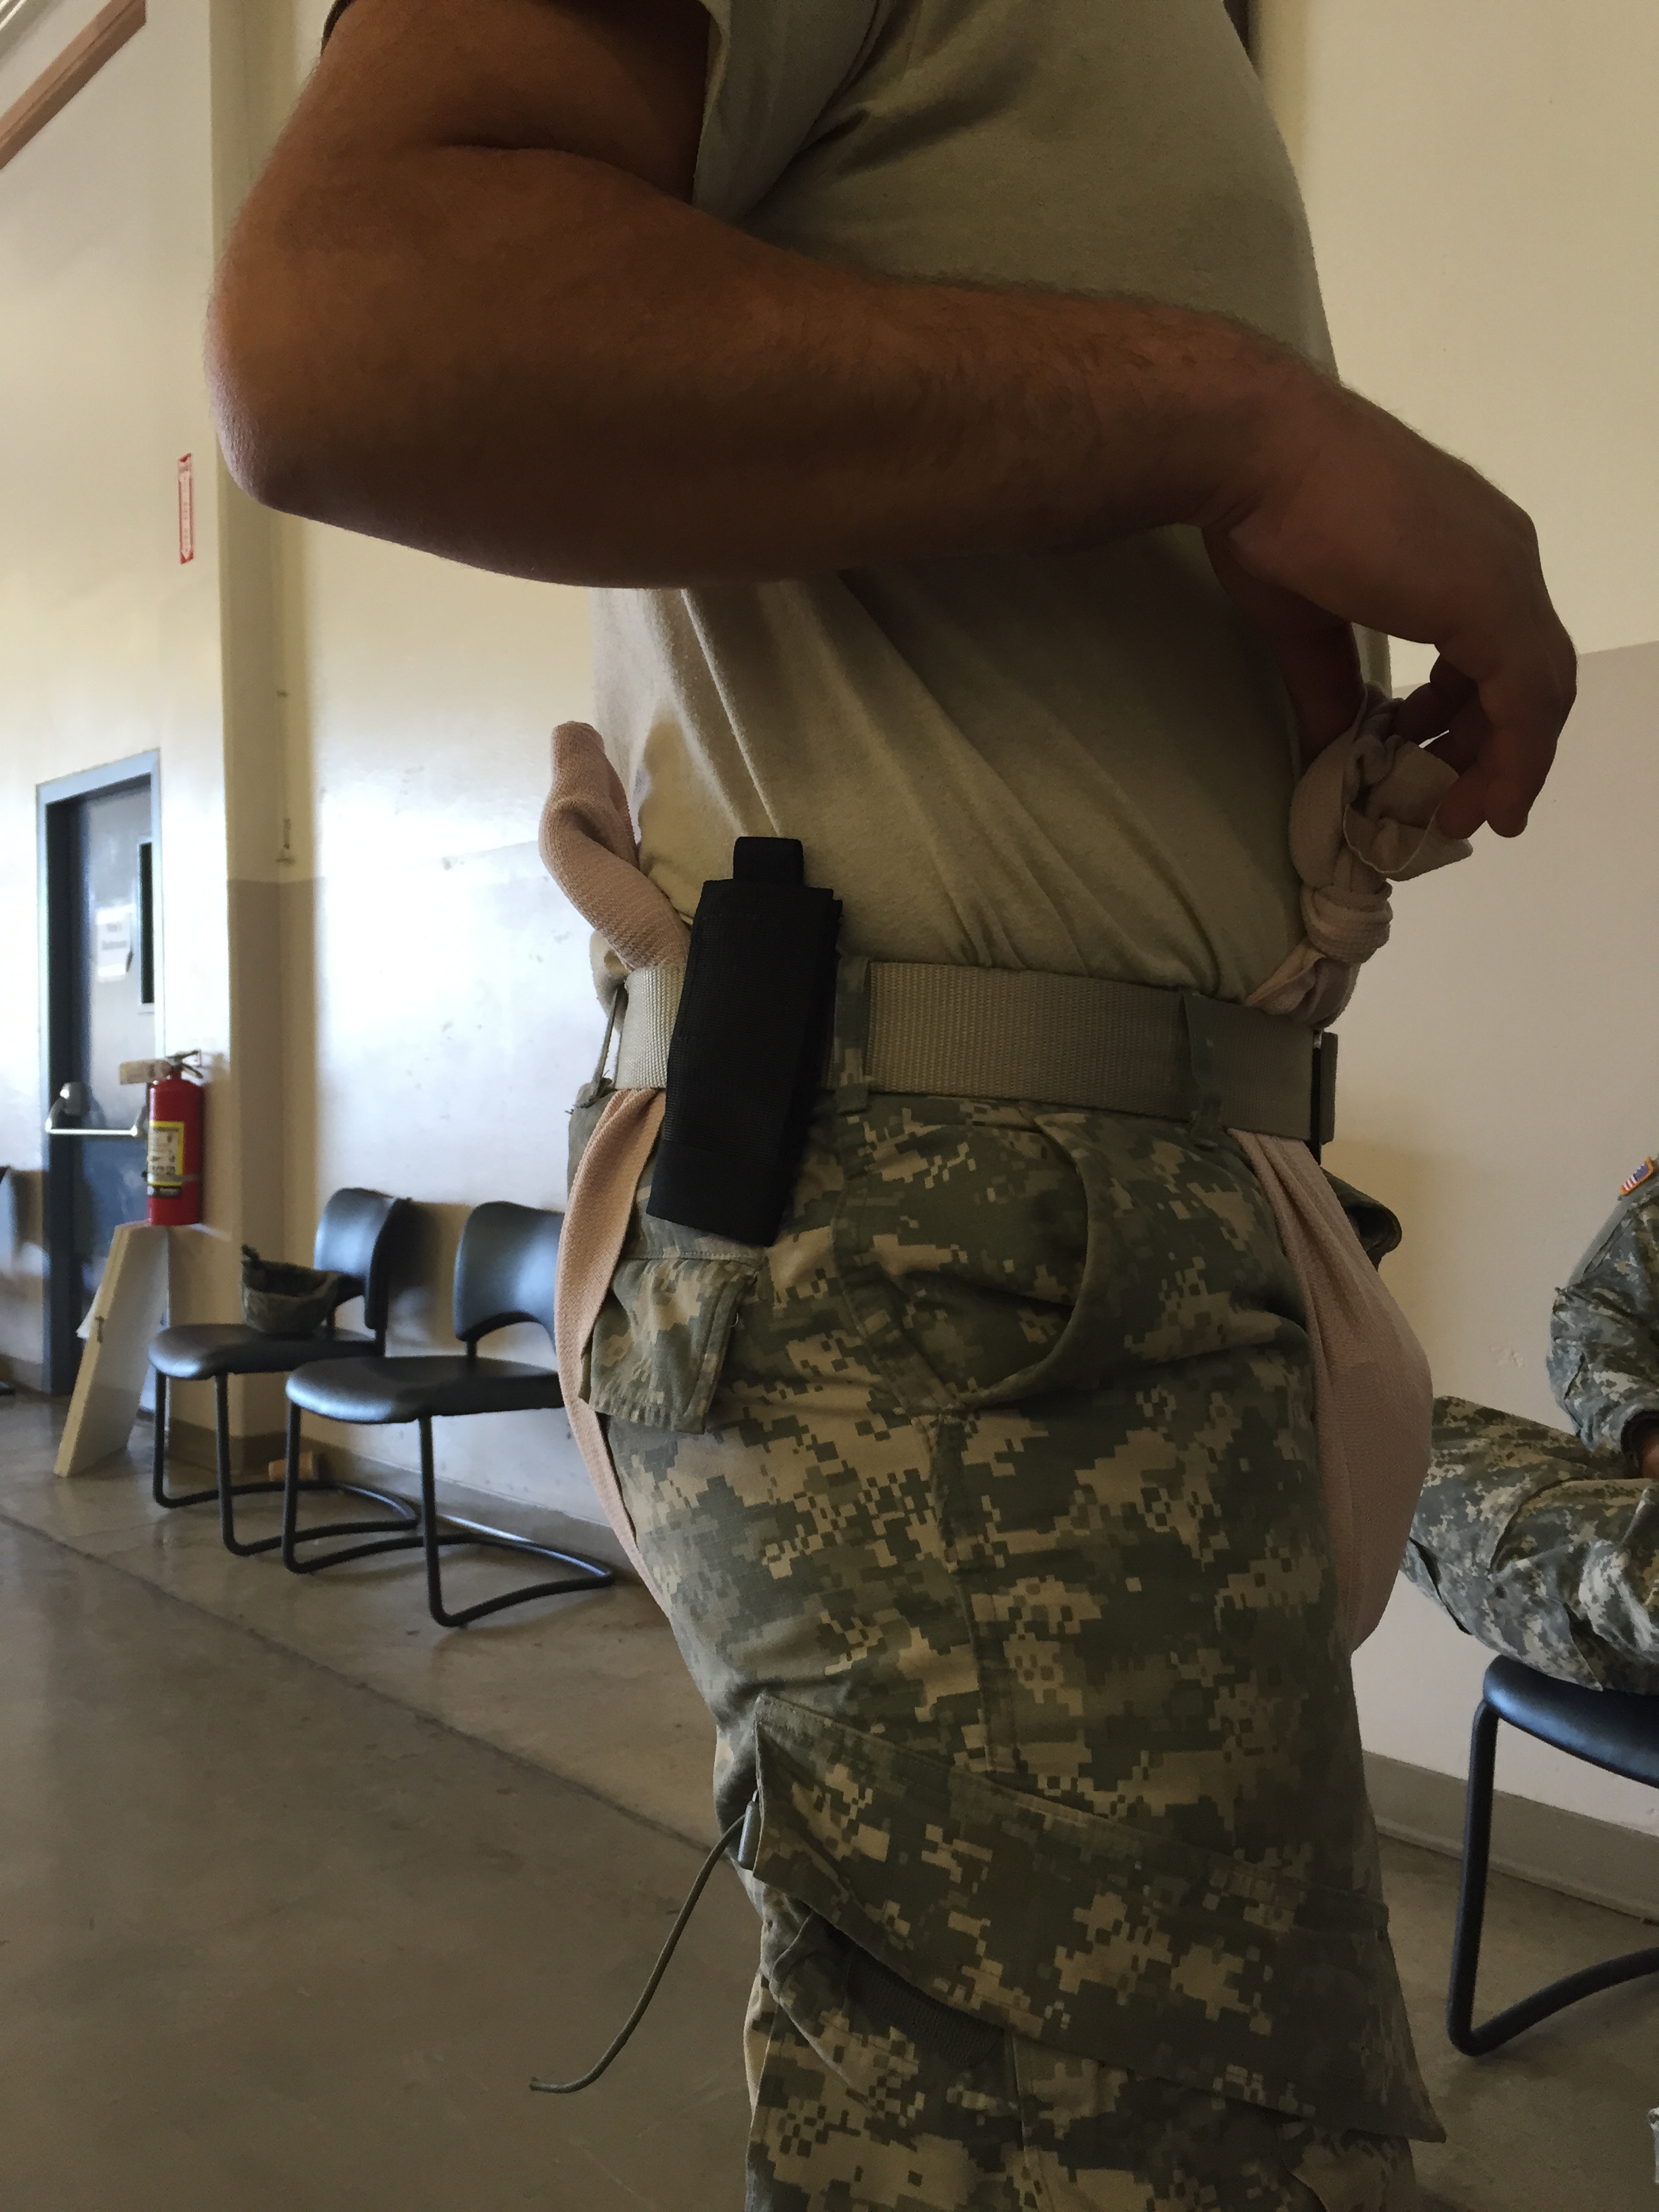
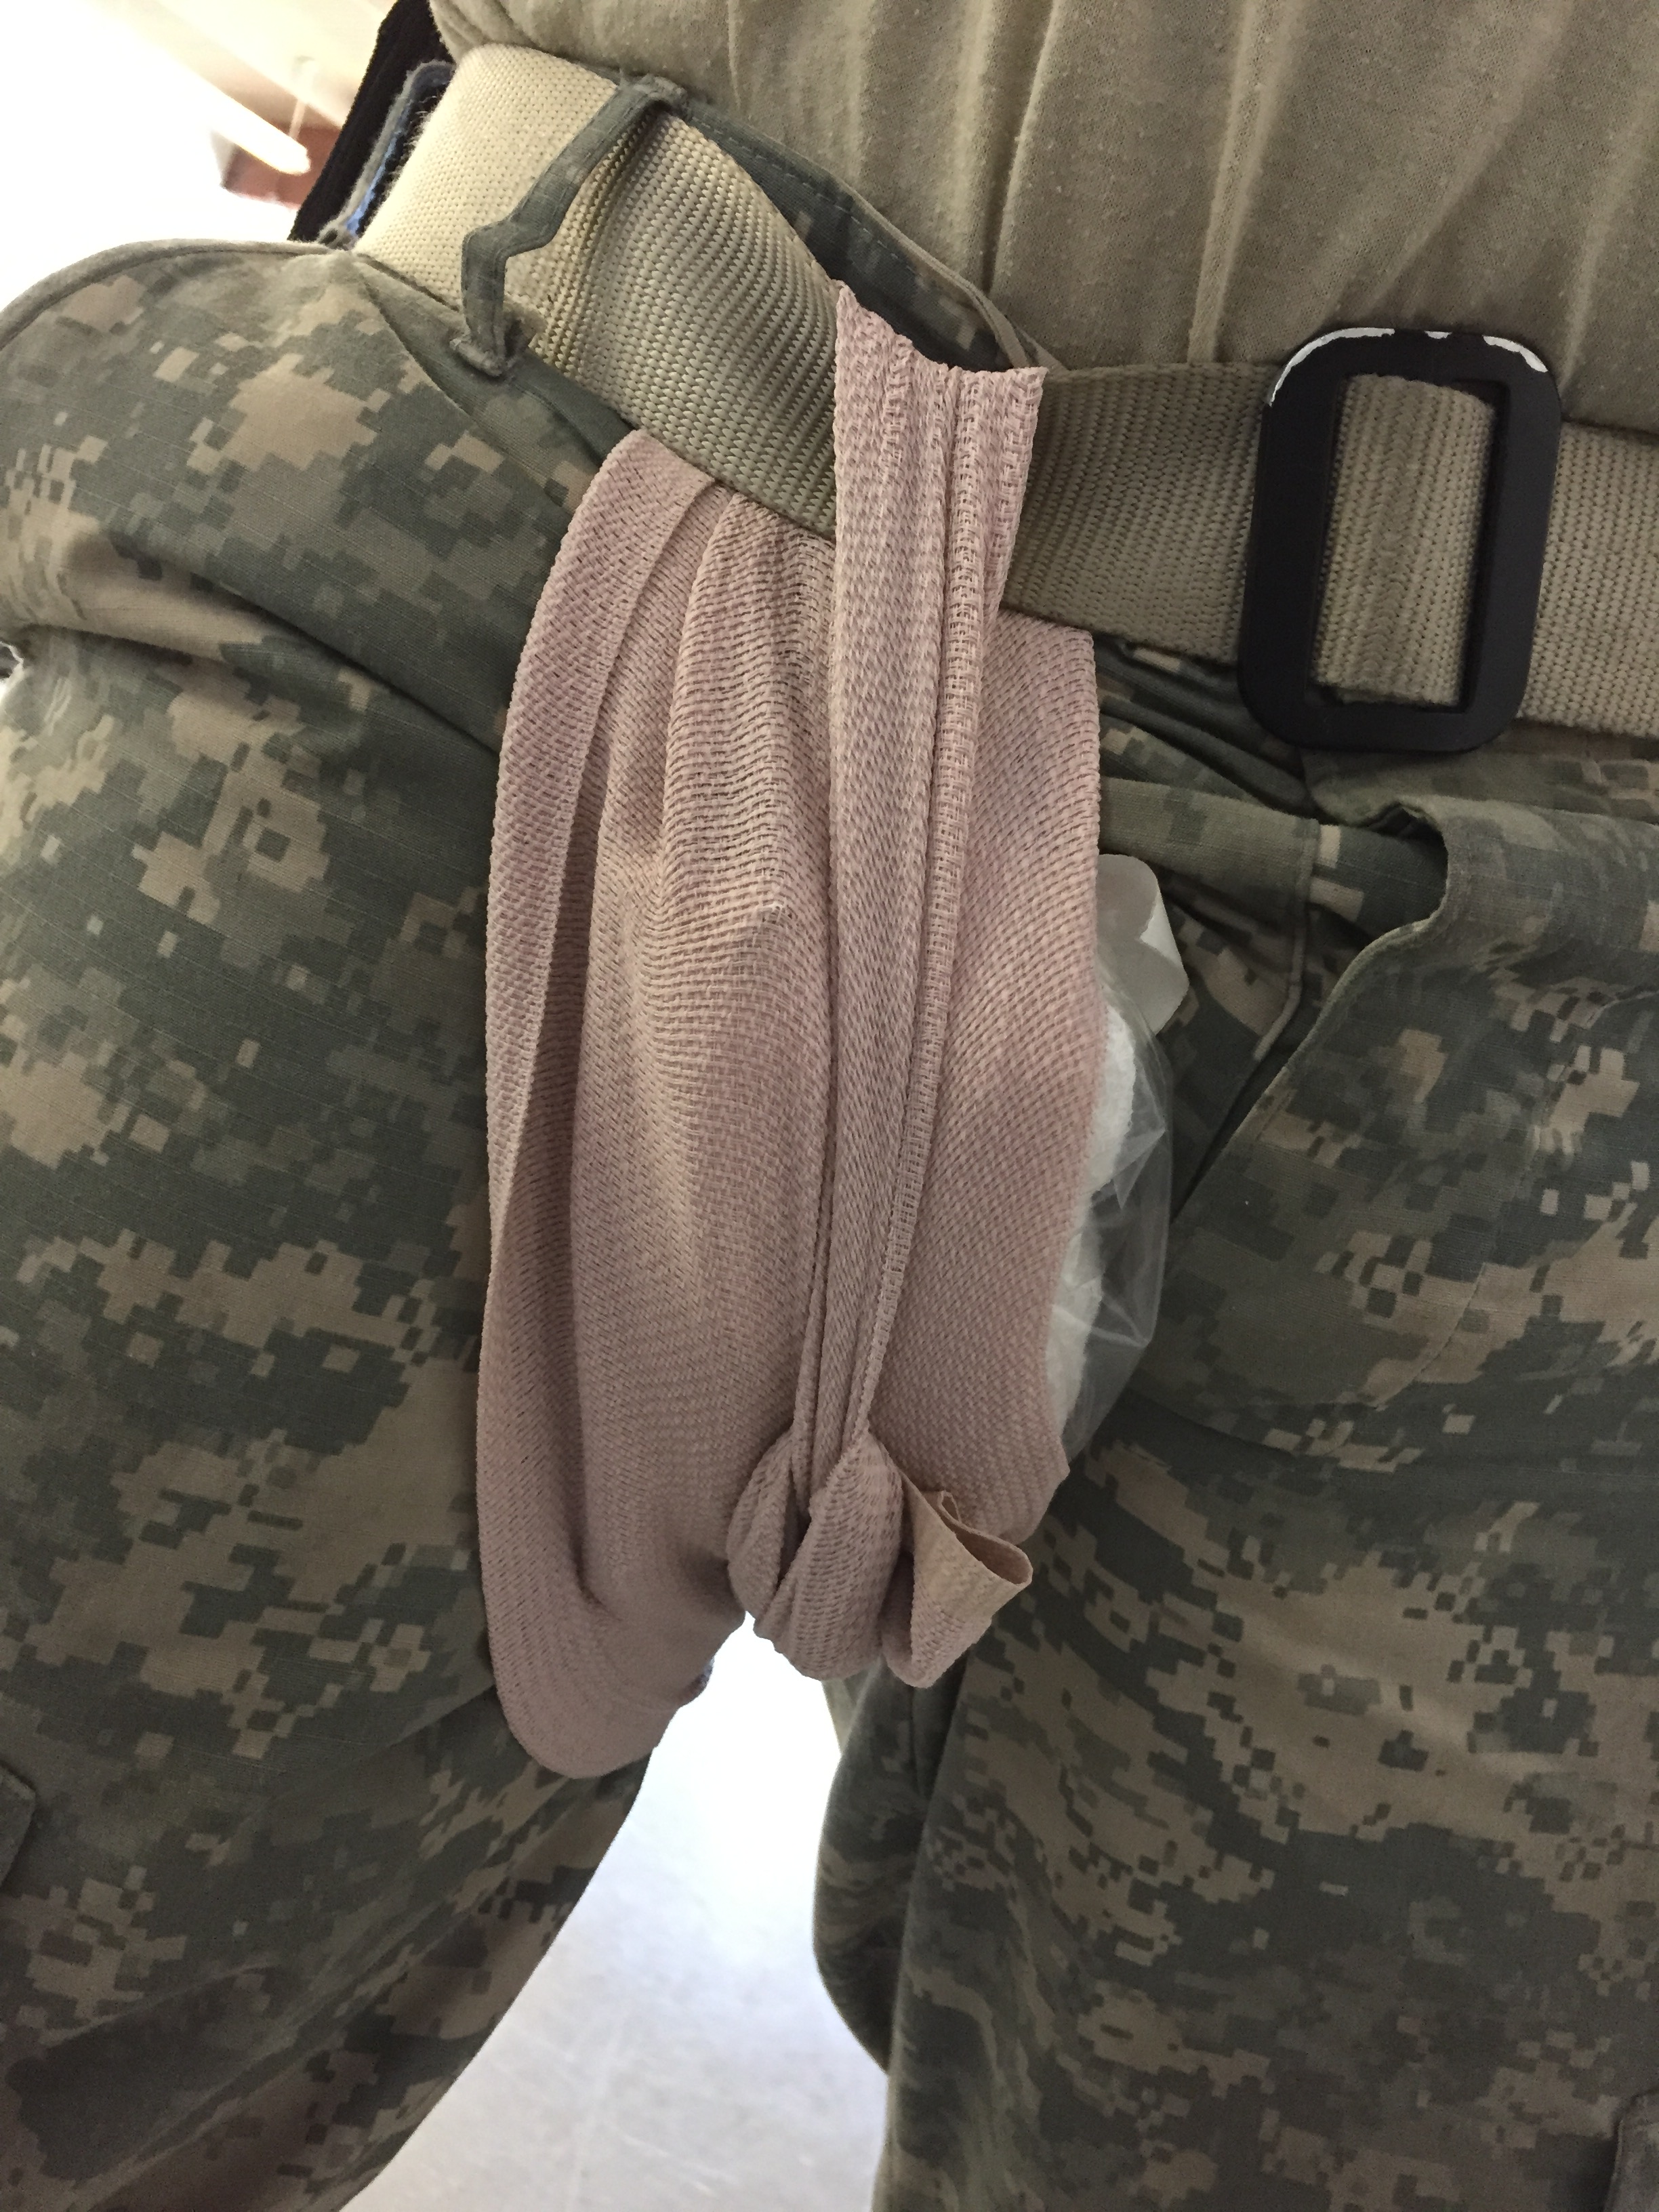
To finish, pass the long end through the loop tied in the short end in front and pull down with 2:1 purchase and tie it off.
These are some quick things to do to that can be easily practiced with friends, neighbors, and countrymen.

Pingback: Hogwarts: Difficult Pressure Dressings | Western Rifle Shooters Association·
Didn’t learn this in 91B school
LikeLike
Neither did I, but experience is that grand teacher. One must use their creativity when working and dressing your patients.
LikeLike
I think most of this stuff has worked its way back stateside into the training at 68W school.
Crank it on way tighter than I did in the demo for the pics.
When packing wounds I dont look for the bleed like they show in the video unless im packing hemostatic gauze. I stuff it in deep then north then east then south then west, basicly in all directions tight. I pack it in with pressure. Then apply pressure over the top. Alwase leave a tail hanging out. I have placed up to 6 rolls packed tight into an inguinal wound. 6 tails hang out.
last week I got good control on a hemopheliac open distal femur fracture that way in the ER after injecting the knee with blue dye to ensure the joint was not open as well.
LikeLike
Nice article about dressings. Like the pics, they are a good addition.
LikeLike
linked over from Active Response Training. Excellent post– thanks for this and your service.
LikeLike